Control Panel
A panel for managing lists of favorite assets, global filters and the blacklist.
Control Panel has 4 sections:
- Favorites - lists of favorite assets.
- Blacklist - the list of blacklisted assets.
- Global Filters - management of parameters for global, platform-wide filtering of signals.
- Alerts - setup of custom signals.
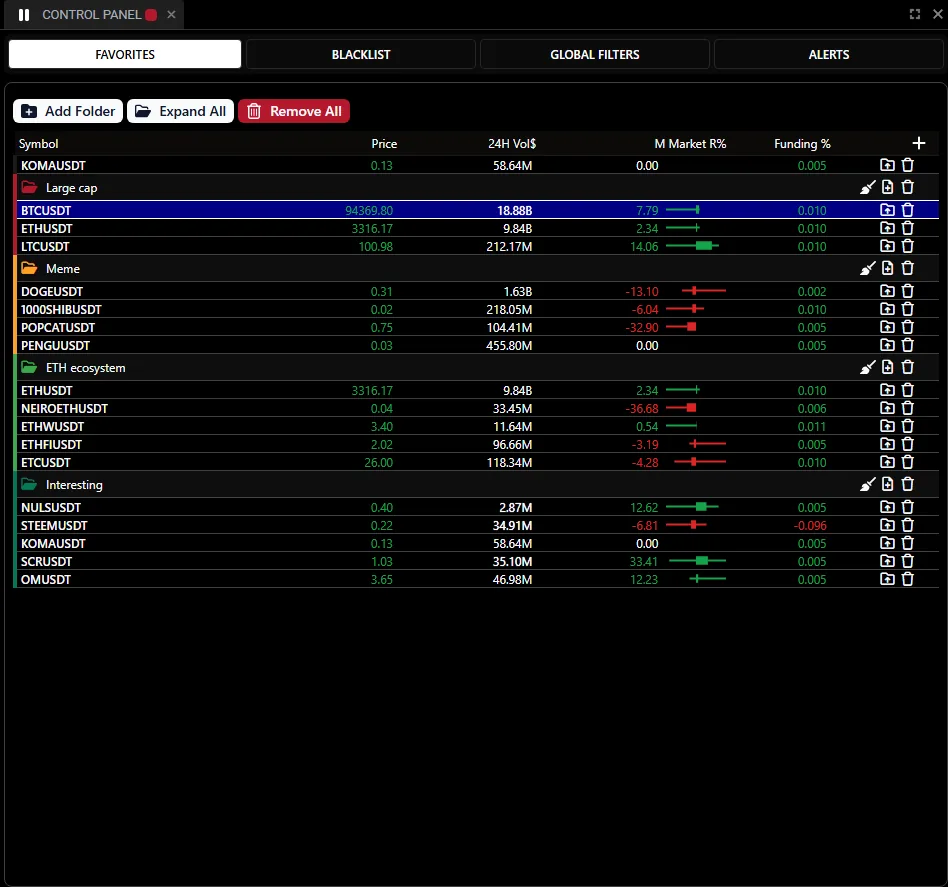
Widget appearance.
The Control Panel widget can be synchronized by color with other widgets. To do this, set the same color in the square in the Control Panel header and in the header of the other widget you want to synchronize Control Panel with. After synchronization, clicking a table row in Control Panel opens the symbol of that row's asset in the synchronized widgets.
Control Panel synchronization.
Favorites
To go to the "Favorites" section, click the button of the same name in Control Panel.

Going to the "Favorites" section.
While working with the platform, users can add instruments to the favorites list with the star button . When you click it, the asset ticker is added to the favorites list, and you can quickly switch to it by clicking the corresponding row.
Adding an asset to favorites in the chart widget.
The "Favorites" section is a table divided into folders.
The column configuration can be customized. To do this, click the plus + button in the upper right part of Control Panel and choose the metrics you need from the dropdown list. Metrics that are already added are marked with a check mark ✔. To remove a column from Control Panel, click the metric again.
Assets can be sorted by any metric added to the Control Panel table. To do this, click the metric name in the table header. The arrow shows the sorting direction: ↑ - descending, ↓ - ascending.
The user can collapse and expand individual folders. To do this, click the colored folder symbol 🗂 of the folder you want to collapse or expand.
Collapsing and expanding a folder in Control Panel.
Each folder can be cleared of the assets in it by clicking the broom button 🧹.
Clearing a folder in Control Panel.
To add an asset/instrument to a folder, click the sheet symbol 📄 with a plus + and choose the ticker of the asset/instrument from the dropdown list. The dropdown list has a search field to make searching easier.
Adding a new symbol to a folder in Control Panel.
To delete a folder, click the trash can symbol 🗑.
Deleting a folder in Control Panel.
You can also delete an individual asset/instrument from a folder.
Deleting an asset from a folder in Control Panel.
The Favorites section has 3 buttons: "Add Folder", "Collapse/Expand All" and "Remove All". Let's go through each button separately.
The "Add Folder" button creates a new folder.
The "Collapse/Expand All" button collapses/expands all created folders.
Collapsing/expanding all folders.
To fully clear Control Panel of all symbols and folders, click the red "Remove All" button and confirm the action in the pop-up window.
Above the folders created by the user are the assets that are pinned in one widget or another.
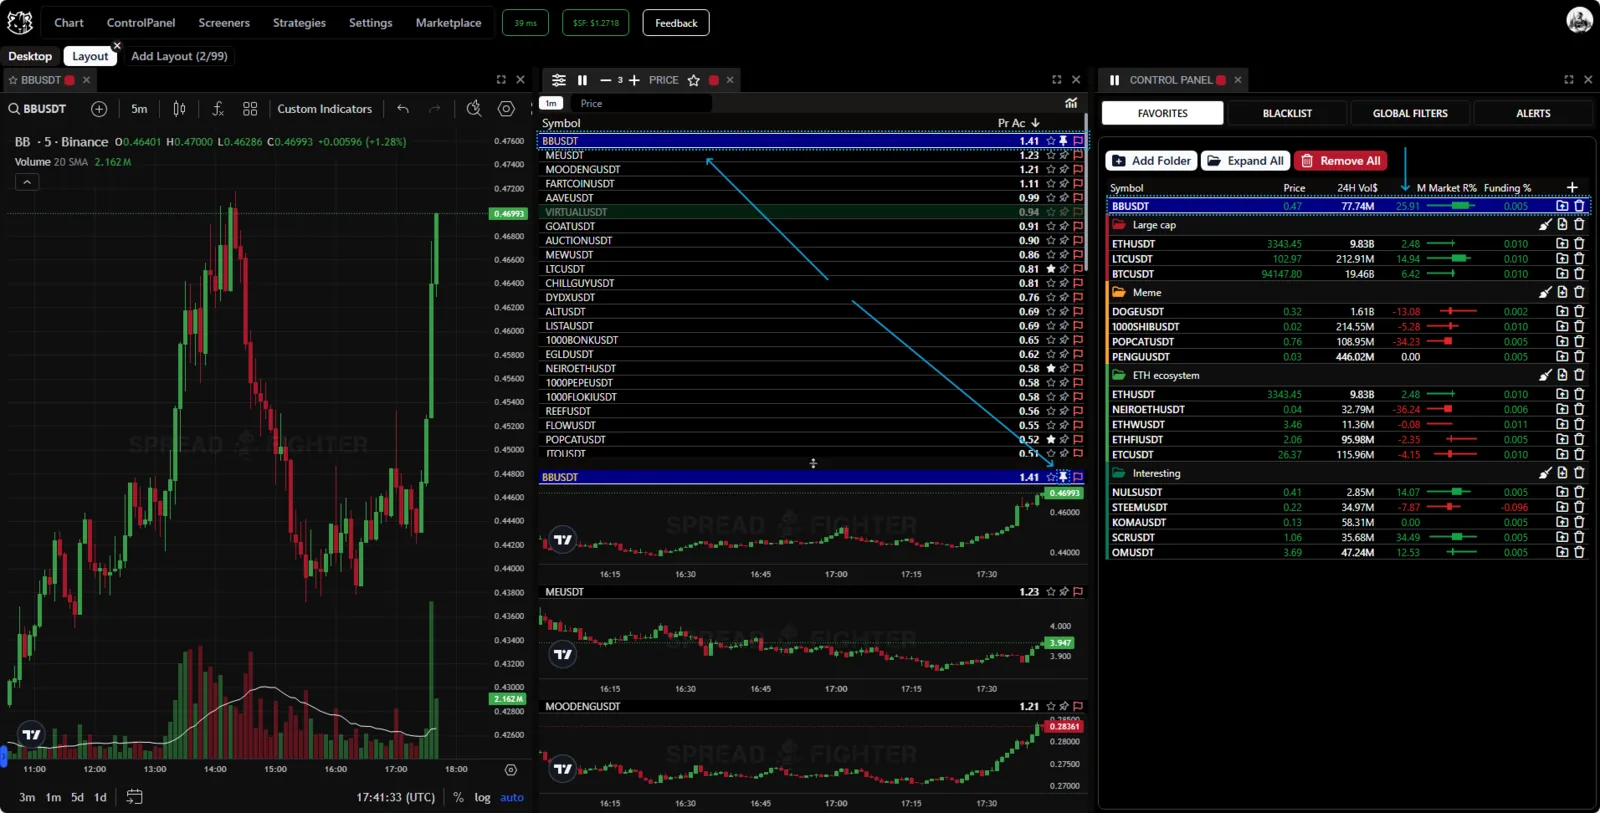
The BBUSDT asset is pinned in Top Gainers: Price. That is why it is placed above all others in Control Panel.
Blacklist
The blacklist section lets you exclude assets from the results.

Blacklist.
This feature is useful for reducing noise. For example, the USDCUSDT trading pair (stablecoin against stablecoin) is a very specific trading instrument traded by an extremely small group of traders. However, this pair may occasionally appear in the results of some models. The blacklist feature is there to exclude it.
There are several ways to add an asset to the blacklist.
The first way is directly from the Blacklist panel. To do this, click the sheet symbol 📄 with a plus + and choose the ticker of the asset/instrument from the dropdown list. The dropdown list has a search field to make searching easier.
Adding an asset to the blacklist.
The second way to add an asset to the blacklist is directly from a widget by clicking the red flag symbol 🏴.
Adding an asset to the blacklist.
To remove an asset from the blacklist, click the red Remove button. After that, the asset returns to the results.
Removing an asset from the blacklist.
Global Filters
Global filters let you exclude from the results the signals for assets that do not meet the condition of a given metric.
For example, exclude all assets whose 24-hour trading volume is below $ 1M.
The list of available filters depends on the subscription level. Filters for individually purchased models can also be added to Global Filters.
The list of global filters will change as new models are added to the platform.
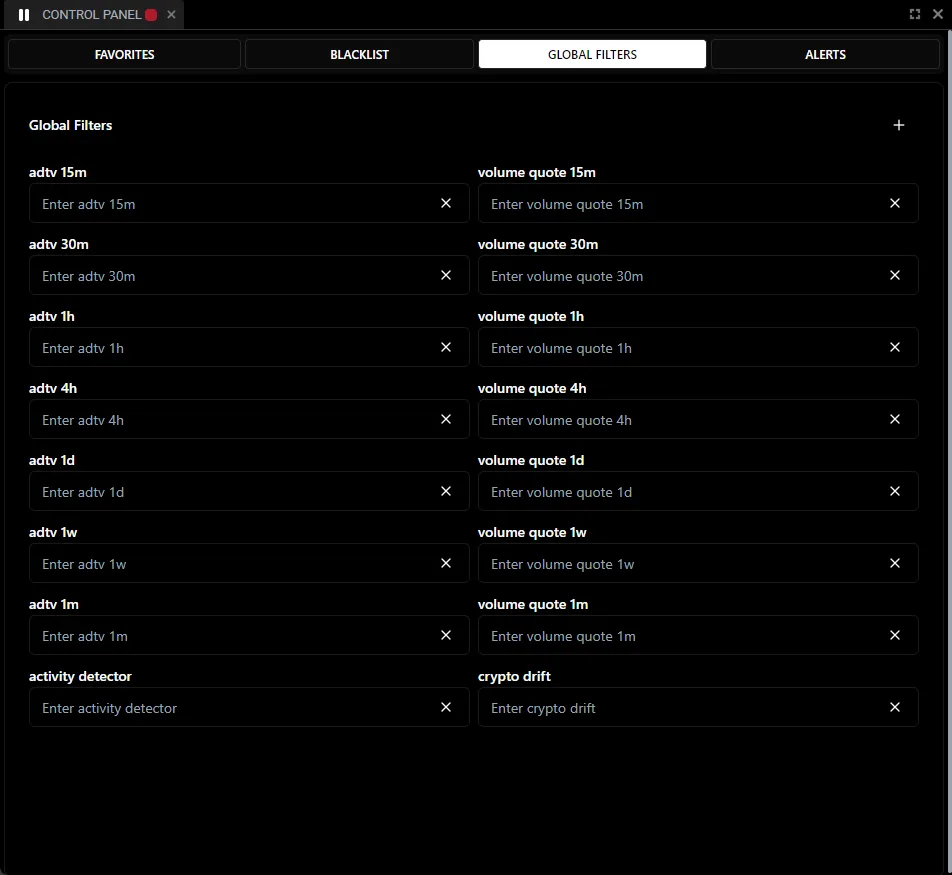
Global Filters
Let's look at a specific example. The user is not interested in assets with funding rates below zero. The user adds the Funding global filter and enters 0 as the value (right part of the screen, the "Control Panel" widget). All signals with funding rates below zero disappear from the results (left part of the screen, the "Spot Perp Spread" widget).
Example of using global filters.
The global filter configuration is very flexible and lets you filter assets by almost every model available on the platform. To add a global filter, click the plus + symbol in the upper right part of the widget and choose the parameter you need.
To delete a global filter, click the cross × next to the filter.
Alerts
This section is under development.

Alerts