Workspace
This article describes the main elements of working with the platform: layouts, workspaces, and presets
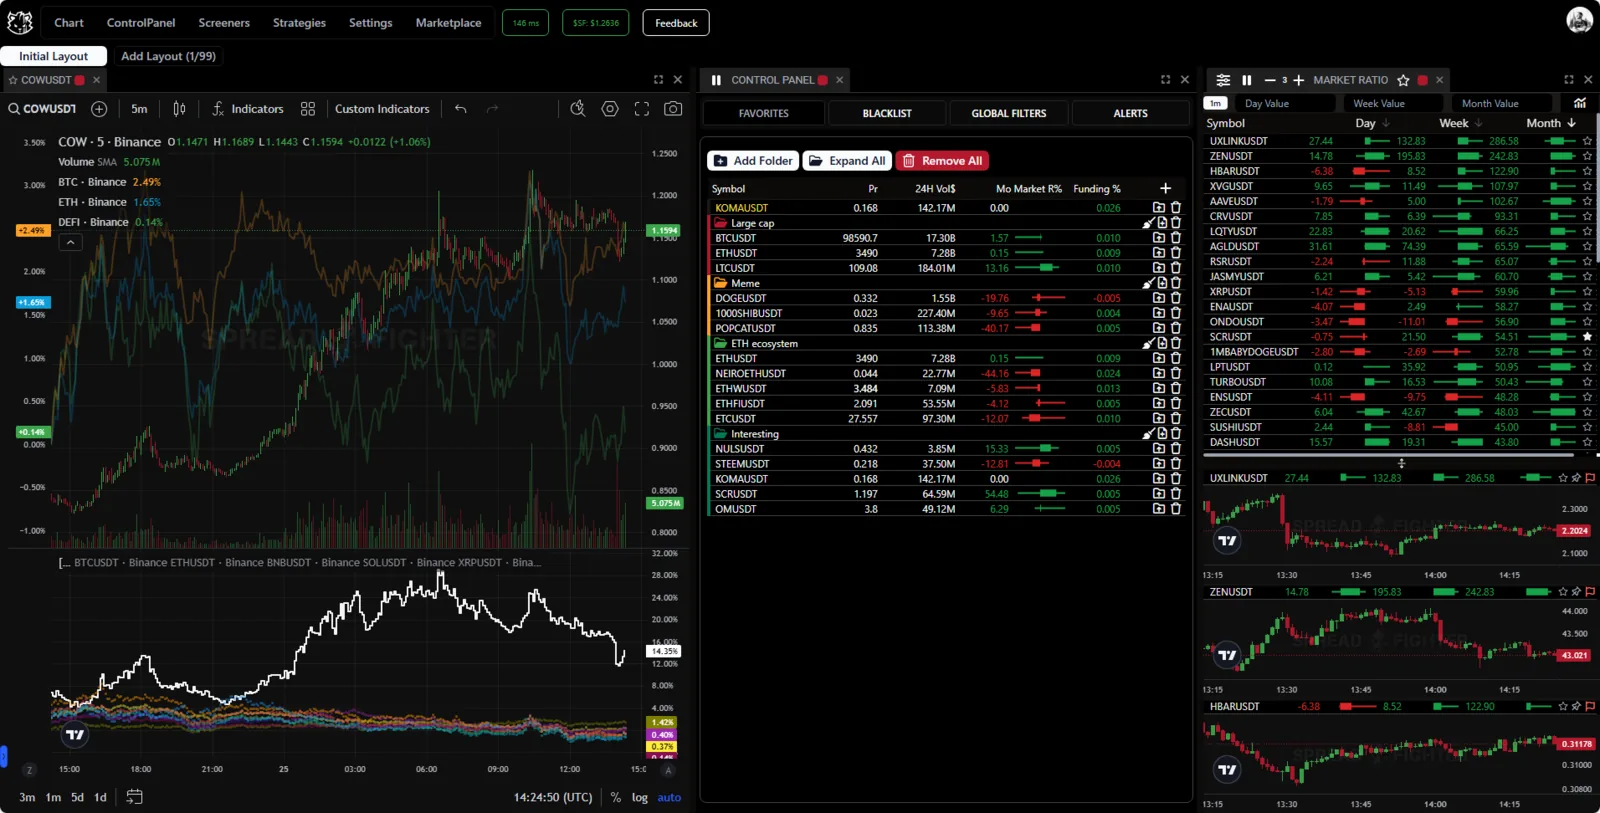
The SpreadFighter platform.
The platform lets the user create and save different workspace configurations. The "Layout" tool is used for this. To create a new workspace, click the "Add Layout" symbol in the top left part of the screen.

Creating a workspace.
A newly created workspace is named "New Layout". To rename a workspace, double-click it with the left mouse button.

Renaming a workspace.
The number of workspaces you can create depends on the user's subscription level.
To switch between workspaces, select the one you need in the platform header.
To delete a workspace, click the cross × on that workspace.

Workspace delete button.
To clear a workspace, click "Settings"/"Clear Layout" and confirm the action in the dialog window.

Clearing a workspace.
The Settings section also has a Clear storage button, which clears the platform cache. We recommend using it if you run into technical problems with the platform.
The SpreadFighter platform lets you configure the workspace very flexibly with widgets. The widgets are in the platform header. These widgets are available at the top level:
- Chart - charts.
- Control Panel - working with lists of instruments/assets.
- Strategies - a widget that sends trading signals.

Available widget types
The platform has a large number of screeners in the Screeners menu.
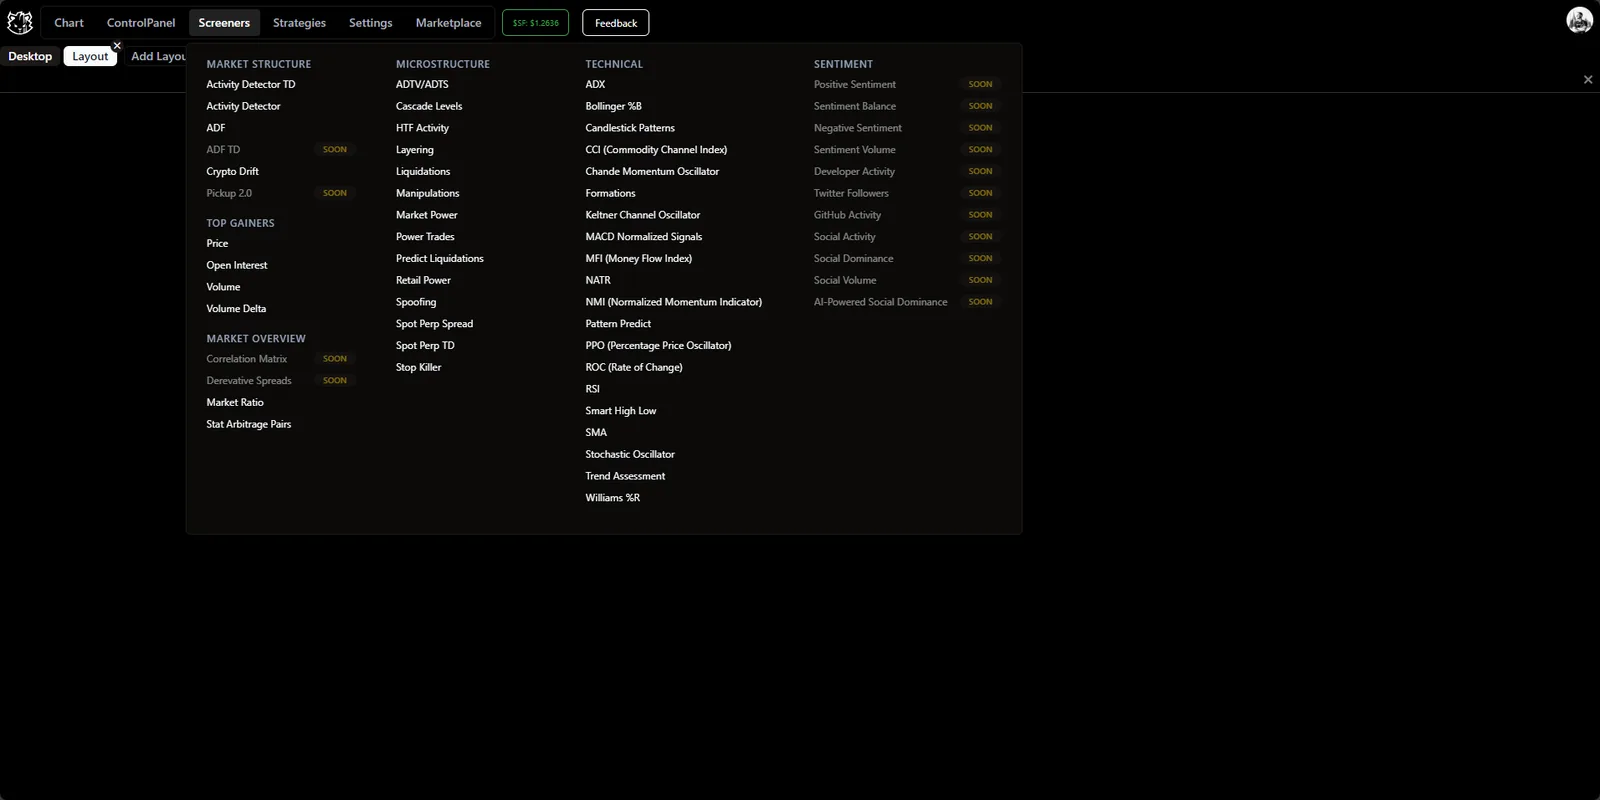
Screeners.
The list of categories and widgets in the screenshot is not final. The platform develops very dynamically.
To add a widget to the workspace:
- Select it in the menu.
- Move the cursor onto the workspace.
- Confirm the placement with the left mouse button.
Widgets adjust to the workspace automatically to fill it as efficiently as possible.
To resize a widget, hold the left mouse button on its border and drag in the direction you need. The widgets next to the one you resize are resized too, so the workspace stays filled as efficiently as possible.
You can combine different widgets into tabbed groups and switch between them. To do this, place the new widget next to the header of an existing widget when you add it.
Several widgets in one tab group.
You can add the symbol/asset open in a widget to your favorites list. To do this, click the star in the top left corner of the widget and tick the favorites folder you need. The "+ Add to new folder" button in the same menu creates a new folder and puts the widget's symbol/asset into it right away.

Adding a symbol/asset to favorites.
You can sync widgets with each other and join them into groups. When you change the instrument/asset in one widget of a group, it changes in the whole group. Syncing and grouping work by color. The group color is in the red square in each widget's header, and in the gray square in the chart header. Click the square to open a drop-down list and pick the sync color.

Widget sync.
By default, charts are not synced (gray color). This means that when you click in a widget, the ticker does not change in charts that are not synced with the same color as the widget.

Chart sync.
The "Marketplace" button opens the marketplace page, where the user can configure the contents of their subscription flexibly. The "$SF: xxx" button shows the current price of the SpreadFighter token and takes you to the exchange to buy it. The "Feedback" button lets you leave feedback: report a bug or suggest an improvement to the platform.

Marketplace, SF Coin & Feedback.

Feedback.